python爬虫进阶
多线程
多线程介绍
多线程是为了同步完成多项任务,通过提高资源使用效率来提高系统的效率。线程是在同一时间需要完成多项任务的时候实现的。最简单的比喻多线程就像火车的每一节车厢,而进程则是火车。车厢离开火车是无法跑动的,同理火车也可以有多节车厢。多线程的出现就是为了提高效率。同时它的出现也带来了-些问题。
threading模块
threading模块是python中专门提供用来做多线程编程的模块。threading 模块中最常用的类是Thread 。threading的一些功能函数有:
- 查看线程数:使用threading . enumerate()函数便可以看到当前线程的数量。
- 查看当前线程的名字:使用threading.current _thread() 可以看到当前线程的信息。
例示代码如下:1
2
3
4
5
6
7
8
9
10
11
12
13
14
15
16
17
18
19
20
21
22
23
24
25
26#encoding: utf-8
import time
import threading
def coding():
for x in range(3):
print('正在写代码%s'%threading.current_thread())
time.sleep(1)
def drawing():
for x in range(3):
print('正在画图%s' % threading.current_thread())
time.sleep(1)
def main():
t1 = threading.Thread(target=coding)
t2 = threading.Thread(target=drawing)
t1.start()
t2.start()
print(threading.enumerate())
if __name__ == '__main__':
main()
运行结果:1
2
3
4
5
6
7
8
9正在写代码<Thread(Thread-1, started 1648)>
正在画图<Thread(Thread-2, started 10252)>[<_MainThread(MainThread, started 13940)>, <Thread(Thread-1, started 1648)>, <Thread(Thread-2, started 10252)>]
正在写代码<Thread(Thread-1, started 1648)>正在画图<Thread(Thread-2, started 10252)>
正在画图<Thread(Thread-2, started 10252)>
正在写代码<Thread(Thread-1, started 1648)>
Process finished with exit code 0
由运行结果可看出:总共有三个线程,两个子线程执行先后顺序是不固定的。
Thread类:
为了让线程代码更好的封装。可以使用thdeading 模块下的Thread类,继承自这个类,然后实现run 方法,线程就会自动运行run方法中的代码。例示代码如下:
1 | #encoding: utf-8 |
多线程共享全局变量问题及解决办法:锁机制
多线程都是在同一个进程中运行的。因此在进程中的全局变量所有线程都是可共享的。这就造成了一个问题,因为线程执行的顺序是无序的。全局变量变换也是无规则的,有可能会造成数据错误。示例代码如下:
1 | #encoding: utf-8 |
运行结果:
1 | 没上锁前: |
注意:如果没有全局变量或者只是单纯的访问全局变量,不要用锁机制
多线程之生产者和消费者
Lock版
生产者和消费者模式是多线程开发中经常见到的一种模式。生产者的线程专门]用来生产一些数据,然后存放到一个中间的变量中。消费者再从这个中间的变量中取出数据进行消费。但是因为要使用中间变量,中间变量经常是一些全局变量,因此需要使用锁来保证数据完整性。
例示代码如下:
1 | import time |
Condition版
Lock版本的生产者与消费者模式可以正常的运行。但是存在一个不足,在消费者中,总是通过while True死循环并且上锁的方式去判断钱够不够。上锁是一个很耗费CPU资源的行为。 因此这种方式不是最好的。还有一种更好的方式便是使用threading.Condition来实现。threading. Condition可以在没有数据的时候处于阻塞等待状态。一旦有合适的数据了,还可以使用notify 相关的函数来通知其他处于等待状态的线程。这样就可以不用做一-些无用的上锁和解锁的操作。可以提高程序的性能。
threading.Condition 类似threading.Lock ,可以在修改全局数据的时候进行上锁,也可以在修改完毕后进行解锁。以下将一些常用的函数做个简单的介绍:
- acquire :上锁。
- release :解锁。
- wait :将当前线程处于等待状态,并且会释放锁。可以被其他线程使用notify和notify_ all函数唤醒。被唤醒后会立马上锁,继续执行下面的代码。
- notify :通知某个正在等待的线程,默认是第1个等待的线程。需要在release之前调用。
- notify. all :通知所有正在等待的线程。 notify和notify. al1不会释放锁。并且需要在release之前调用。
Condition版的生产者与消费者模式示例代码如下:1
2
3
4
5
6
7
8
9
10
11
12
13
14
15
16
17
18
19
20
21
22
23
24
25
26
27
28
29
30
31
32
33
34
35
36
37
38
39
40
41
42
43
44
45
46
47
48
49
50
51
52
53
54
55
56
57
58
59#encoding: utf-8
import threading
import random
import time
gMoney = 1000
gCondition = threading.Condition()
gTotalTimes = 10
gTimes = 0
class Producer(threading.Thread):
def run(self):
global gMoney
global gTimes
while True:
money = random.randint(100,1000)
gCondition.acquire()
if gTimes >= gTotalTimes:
gCondition.release()
break
gMoney += money
print('%s生产了%d元钱,剩余%d元钱'%(threading.current_thread(),money,gMoney))
gTimes += 1
gCondition.notify_all() # 提醒所有等待的线程
gCondition.release()
time.sleep(0.5)
class Consumer(threading.Thread):
def run(self):
global gMoney
while True:
money = random.randint(100,1000)
gCondition.acquire()
while gMoney < money: # 被提醒不需等待后仍要排队,所以还是可能会出现生产的不够消费的情况,所以还是需要判断。
if gTimes >= gTotalTimes:
gCondition.release() # 返回整个函数之前还是要记得释放锁
return # break只能跳出最近的while循环
print('%s准备消费%d元钱,剩余%d元钱,不足!' % (threading.current_thread(),money,gMoney))
gCondition.wait() # 等待 结束等待后继续执行下面的代码
gMoney -= money
print('%s消费了%d元钱,剩余%d元钱' % (threading.current_thread(),money,gMoney))
gCondition.release()
time.sleep(0.5)
def main():
for x in range(3):
t = Consumer(name='消费者线程%d'%x)
t.start()
for x in range(5):
t = Producer(name="生产者线程%d"%x)
t.start()
if __name__ == '__main__':
main()
Queue线程安全队列
在线程中,访问一些全局变量,加锁是一个经常的过程。如果你是想把一些数据存储到某个队列中,那么Python内置了一个线程安全的模块叫做queue 模块。Python中 的queue模块中提供了同步的、线程安全的队列类,包括FIFO (先进先出)队列Queue, LIFO (后入先出)队列LifoQueue.这些队列都实现了锁原语(可以理解为原子操作,即要么不做,要么都做完) ,能够在多线程中直接使用。可以使用队列来实现线程间的同步。相关的函数如下:
- 初始化Queue(maxsize):创建一个先进先出的队列。
- qsize(): 返回队列的大小。
- empty():判断队列是否为空。
- full():判断队列是否满了。
- get():从队列中取最后一个数据。
- put():将一个数据放到队列中。
例示代码如下:1
2
3
4
5
6
7
8
9
10
11
12
13
14
15
16
17
18
19
20
21
22
23
24
25
26
27
28#encoding: utf-8
from queue import Queue
import time
import threading
def set_value(q): # 带有参数 队列q
index = 0
while True:
q.put(index)
index += 1
time.sleep(3)
def get_value(q):
while True:
print(q.get())
def main():
q = Queue(4)
t1 = threading.Thread(target=set_value,args=[q])
t2 = threading.Thread(target=get_value,args=[q])
t1.start()
t2.start()
if __name__ == '__main__':
main()
GIL全局解释器锁
Python自带的解释器是CPython 。CPython 解释器的多线程实际上是一个假的多线程(在多核CPU中,只能利用一核,不能利用多核,但是cpu在不断地切换线程,给我们多线程的感觉 )。同一时刻只有一个线程在执行,为了保证同一时刻只有一个线程在执行,在CPython 解释器中有一个东西叫做GIL (GlobalIntepreter Lock) , 叫做全局解释器锁。这个解释器锁是有必要的。因为CPython解释器的内存管理不是线程安全的。当然除了CPython解释器,还有其他的解释器,有些解释器是没有GIL 锁的,见下面:
- Jython :用Java实现的Python解释器。不存在GIL锁。
- IronPython :用.net 实现的Python解释器。不存在GIL锁。
PyPy: 用Python实现的Python解释器。存在GIL锁。
GIL虽然是一个假的多线程。但是在处理一些IO操作 (比如文件读写和网络请求)还是可以在很大程度上提高效率的。在I0操作上建议使用多线程提高效率。在一些CPU计算操作上不建议使用多线程,而建议使用多进程。
动态网页数据抓取 AJAX
什么是AJAX
AJAX ( Asynchronouse JavaScript And XML)异步JavaScript和XML。AJAX 是一种在无需重新加载整个网页的情况下,能够更新部分网页的技术。通过在后台与服务器进行少量数据交换,Ajax可以使网页实现异步更新。这意味着可以在不重新加载整个网页的情况下,对网页的某部分进行更新。传统的网页(不使用Ajax) 如果需要更新内容,必须重载整个网页页面。因为传统的在传输数据格式方面使用的是XML 语法。因此叫做AJAX ,其实现在数据交互基本上都是使用JSON。使用AJAX加载的数据,即使使用了JS,将数据渲染到了浏览器中,在(右键->查有网页源代码)还是不能看到通过ajax加载的数据,只能看到使用这个url加载的html代码。
获取ajax数据的方式:
1.直接分析ajax调用的接口。然后通过代码请求这个接口。
2.使用Selenium+chromedriver模拟浏览器行为获取数据。
| 方式 | 优点 | 缺点 |
|---|---|---|
| 分析接口 | 直接可以请求到数据。不需要做一些解析工作。代码量少,性能高。 | 分析接口比较负责,特别是一些通过js 混淆的接口,要有一定的js功底。容易被发现是爬虫。 |
| selenium | 直接模拟浏览器的行为。浏览器能请求到的,使用selenium也能请求到。爬虫更稳定。 | 代码量多。性能低。 |
Selenium+chromedriver获取动态数据:
Selenium相当于是一个机器人。可以模拟人类在浏览器上的-些行为,自动处理浏览器上的一些行为,比如点击,填充数据,删除cookie等。Selenium最初是用来做自动化测试的,只是后来被发现可以运用在爬虫中。针对不同的浏览器有不同的driver。以下是两个浏览器及其对应的driver:
- Chrome的Chromedriver· : http://sites.google.com/a/chromium.org/chromedriver/downloads
- Firefox的geckodriver: https://github.com/mozilla/geckodriver/releases
安装Selenium和Firefox的geckodriver
1.安装Selenium : Selenium 有很多语言的版本,有java、ruby、 python等。 我们下载python版本的就可以了。
1 | pip install selenium |
2.安装geckodriver :下载完成后,放到不需要权限的纯英文目录下就可以了。
Selenium操作
打开和关闭
关闭页面:
- driver.clkse() :关闭当前页面。
- driver.quit() :退出整个浏览器。
例示代码:1
2
3
4
5
6
7
8
9
10
11
12
13
14#encoding: utf-8
from selenium import webdriver
import time
driver_path = r"D:\FireFoxDriver\geckodriver.exe"
driver = webdriver.Firefox(executable_path=driver_path)
driver.get('https://www.baidu.com/')
print(driver.page_source) # 打印网页源代码
time.sleep(5)
# driver.close()
driver.quit()
定位元素
- find_ element_ by _id :根据id来查找某个元素。
1 | submitTag = driver. find_ element_ by_ id('su') |
- find_ element_by_class_name :根据类名查找元素。
1 | submitTagI driiver. find_ element by_ class_ name('su') |
- find _element _by _name :根据name属性的值来查找元素。
1 | submitTag = driver. find_ element_by_name( ' email' ) |
- find element_ by_ tag_ name :根据标签名来查找元素。
1 | submitTag = driver.find_ element _by_tag. name('div') |
- find_ element _by_xpath :根据xpath语法来获取元素。
1 | submitTag = driver.find_ element_ by_xpath('//div') |
- find element_ by_ .css_ selector :根据css选择器选择元素。
1 | submitTag。driver. find_ element_ by_ Css_ selector('//div') |
操作表单元素
- 操作输入框: 分为两步。第一步:找到这个元素。第二步:使用send, _keys(value) ,将数据填充进去。示例代码如下:
1 | inputTag = driver. find element_ by_id('kw' ) |
使用Clear方法可以清除输入框中的内容。示例代码如下:1
InputTag. clear()
- 操作checkbox:因为要选中checkbox 标签,在网页中是通过鼠标点击的。因此想要选中checkbox 标签,那么先选中这个标签,然后执行click事件。示例代码如下:
1 | rememberTag = driver.find element_by_name("rememberMe") |
- 选择select: select元素不能直接点击。因为点击后还需要选中元素。这时候selenium就专门为select标签提供了一个类selenium. webdriver . suport.ui .Select。将获取到的元素当成参数传到这个类中,创建这个对象。以后就可以使用这个对象进行选择了。示例代码如下:
1 | from selenium. webdriver. support.ui import Select |
- 操作按钮:操作按鈕有很多种方式。比如単击、右击、双去等。这里讲一个最常用的。就是点击。直接調用click函数就可以了。示例代码如下:
1 | inputTag = driver.find_element_by_id('su') |
行为链
有时候在页面中的操作可能要有很多步,那么这时候可以使用鼠标行为链类ActionChains来完成。比如现在要将鼠标移动到某个元素上并执行点击事件。那么示例代码如下:
1 | #encoding: utf-8 |
还有更多的鼠标相关的操作。
- click and_hold(element): 点击但不松开鼠标。
- context_click(element): 右键点击.
- double_click(element): 双击。
selenium 操作cookie
Cookie操作:
1.获取所有的cookie :
1 | for cookie in driver.get_cookies(): |
2.根据cookie的key获取value:
1 | value.driver.get_cookie(key) |
3.删除所有的cookie:
1 | driver.delete_all_cookies() |
4.删除某个cookie :
1 | driver.delete_cookie(key) |
例示代码如下:
1 | #encoding: utf-8 |
页面等待:
现在的网页越来越多采用了Ajax 技术,这样程序便不能确定何时某个元素完全加载出来了。如果实际页面等待时间过长导致某个dom元素还没出来,但是你的代码直接使用了这个WebElement,那么就会抛出NullPointer的异常。为了解决这个问题。所以Selenium提供了两种等待方式: 一种是隐式等待、一种是显式等待。
- 隐式等待:调用driver.implicitly_wait。那么在获取不可用的元素之前,会先等待传入的时间。示例代码如下:
1 | #encoding: utf-8 |
- 显示等待:显示等待是表明某个条件成立后才执行获取元素的操作。也可以在等待的时候指定一个最大的时间,如果还没超过这个时间就加载出来了就不再等待,如果超过这个时间那么就抛出一个异常。显示等待应该使用selenium. webdriver. support.excepted_conditions 期望的条件和selenium.webdriver.support .ui .WebDriverWait来配合完成。示例代码如下:
1 |
|
- 一些其他的等待条件:
- presence_of_element_located: 某个元素已经加载完毕了。
- presence_of_all_emement_located: 网页中所有满足条件的元素都载完毕了。
- element_to_be_cliable:某个元素是可以点击了。
更多条件请参考:
切换页面
有时候窗口中有很多子tab页面。这时候肯定是需要进行切换的。selenium 提供了一个叫做switch_to.window 来进行切换,具体切换到哪个页面,可以从driver.window_handles 中找到。示例代码如下:
1 | #encoding: utf-8 |
运行结果:1
2
3
4https://www.baidu.com/
6442450945
['6442450945', '6442450949']
https://www.douban.com/
selenium设置代理ip:
有时候频繁爬取一些网页。服务器发现你是爬虫后会封掉你的ip地址。这时候我们可以更改代理ip。更改代理ip,不同的浏览器有不同的实现方式。这里以Chrome 浏览器为例来讲解:
1 | #encoding: utf-8 |
结果说明:执行该代码发现ip还是本机ip(笑哭),找了很久的解决方案也没找到。。。。
WebElement元素:
from selenium . webdriver.remote.webelement import WebElement 类是每个获取出来的元素的所属类。有一些常用的属性:
- get_attribute:这个标签的某个属性的值。
- screentshot:获取当前页面的截图。这个方法只能在driver上使用。
driver的对象类,也是继承自WebElement 。
更多请阅读相关源代码。(ctrl + b)
例示代码如下:
1 | #encoding: utf-8 |
运行结果:1
2<class 'selenium.webdriver.firefox.webelement.FirefoxWebElement'>
百度一下
Tesseract 图片识别
安装及配置
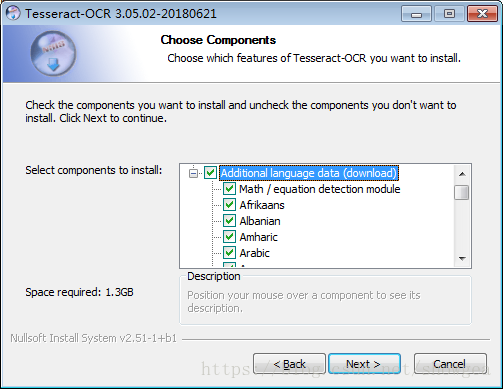
我这里下载的是 tesseract-ocr-setup-3.05.02-20180621.exe
双击安装,然后在如图所示Additional Language data项选择你要识别图片里包含的语言:一般勾选英语、简单汉语和Math,默认c盘路径不要更改。
- 配置环境变量
此电脑-高级设置-环境配置-系统变量:
① 新建,变量名TESSDATA_PREFIX ,变量值:C:\Program Files (x86)\Tesseract-OCR\tessdata。
② 想要在cmd下能够使用tesseract命令,那么需要把tesseract.exe所在的目录放到PATH 环境变量中,找到变量名为path,新添加路径:C:\Program Files (x86)\Tesseract-OCR。
配置完成后在命令行输入tesseract -v验证是否配置成功
用命令tesseract –list-langs来查看Tesseract-OCR支持语言。
在终端下识别图片
cmd命令cd到你要识别图片的路径下,输入命令
1 | tesseract 图片路径 文件路径 |
python代码识别图片
在Python代码中操作tesseract 。需要安装-个库, 叫做pytesseract 。通过pip的方式即可安装:
1 | pip install pytesseract |
并且,需要读取图片,需要借助一个第三方库叫做PIL 。通过pip list看下是否安装。如果没有安装,通过pip的方式安装:
1 | pip install PIL |
例示代码:1
2
3
4
5
6
7
8
9
10
11
12
13
14#encoding: utf-8
import pytesseract
from PIL import Image
# 指定 tesseract.exe所在的路径
pytesseract.pytesseract.tesseract_cmd = r"C:\Program Files (x86)\Tesseract-OCR\tesseract.exe"
# 打开图片
image = Image.open('a.png')
# 调用image_to_string将图片转化为文字。
text = pytesseract.image_to_string(image,lang='eng')
print(text)